
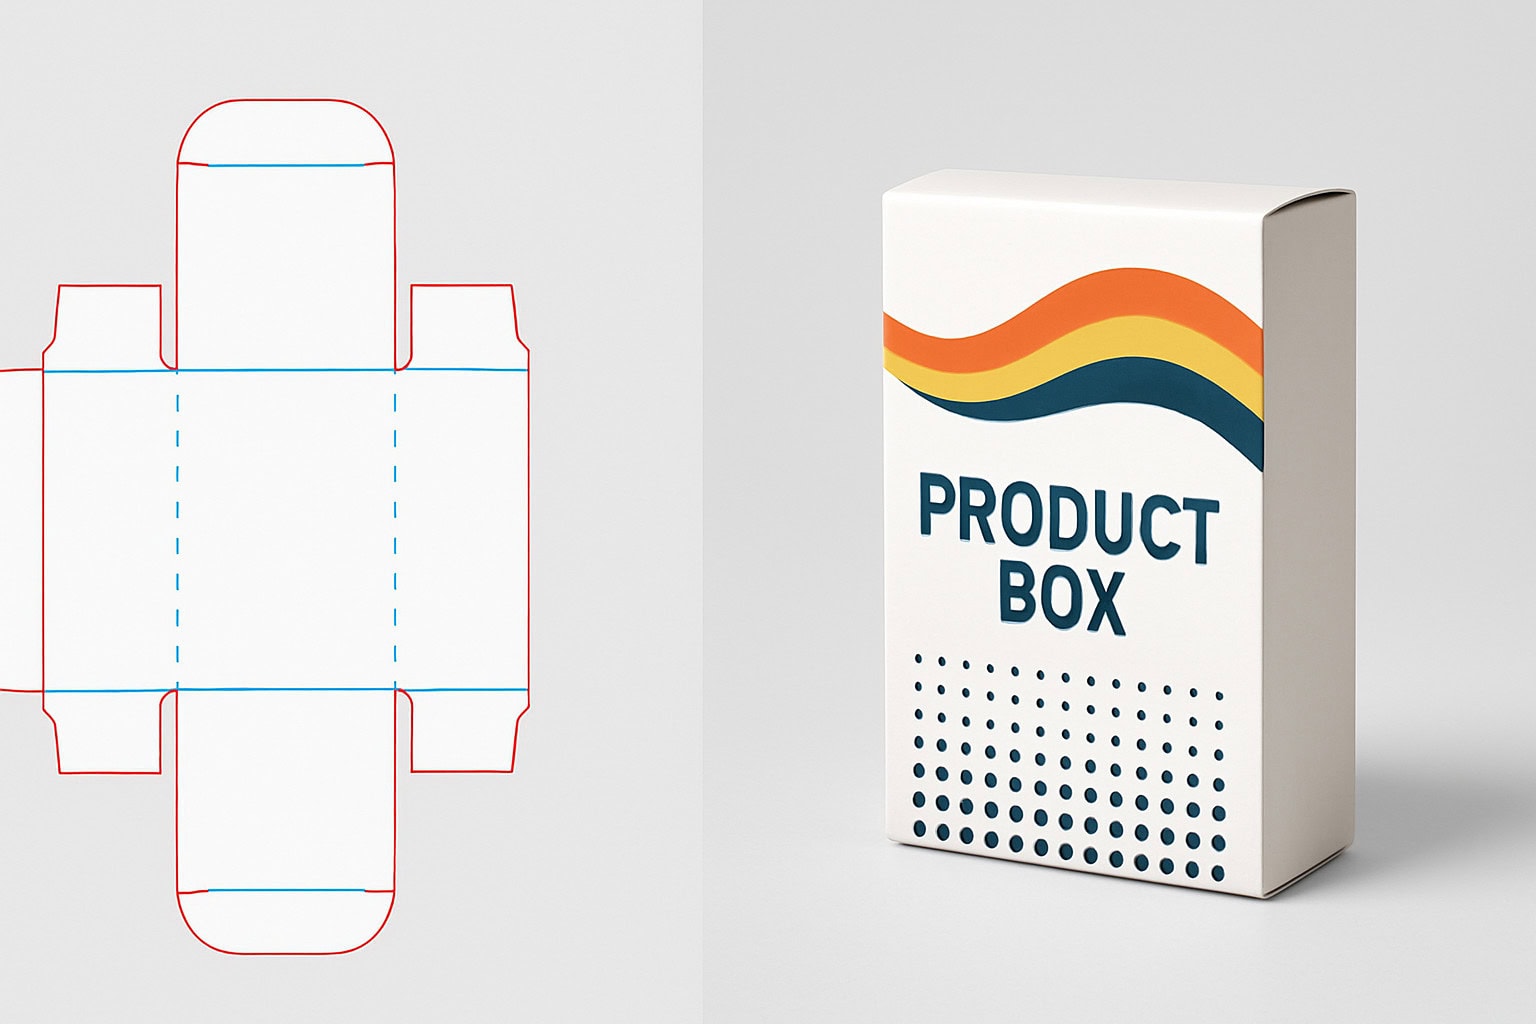
Picture this: you’ve just received your custom packaging samples. The design looks great, but something’s wrong. Your logo is cut in half. The fold lines are nowhere near where they should be. Sound familiar? This happens when people skip one crucial step—understanding what is a dieline.
This guide breaks down everything you need to know about dielines. We’ll cover what they include, how they work, and most importantly—how they save you from costly production headaches.
Fundamental Definition and Core Purpose
What Is a Dieline?
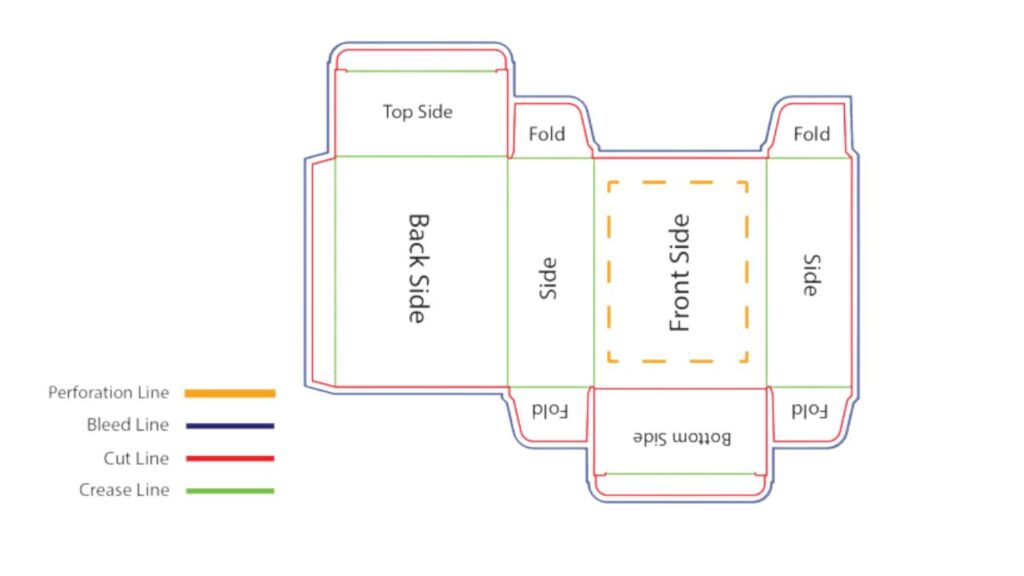
Think of a dieline as a flat map of your future box. It’s a 2D template that shows exactly how your 3D package will look when it’s laid out flat, before it gets folded into shape. Every line has a purpose. Cut lines show where the blade will slice through the material.
Fold lines mark where your package will bend. Perforations indicate tear-away sections. Design elements mark safe zones for your graphics and text.The key function is simple but critical. This template acts as the universal language between you, your designer, and the manufacturer.
It tells the production team exactly what to do. Where to cut. Where to fold. How everything fits together. Without this blueprint, you’re basically asking someone to build your house without any plans.
Why Dielines Matter
Here’s where dielines become your best friend and biggest money-saver. They catch problems before they become expensive disasters. Imagine discovering your company logo gets cut in half only after printing 10,000 boxes. A proper dieline would have spotted this issue during the design phase, not after you’ve spent thousands of dollars.
Dielines also ensure every single box in your batch looks identical. Whether you’re ordering 100 units or 100,000, each package will have the same dimensions, the same fold quality, and the same professional appearance. No wonky boxes. No size variations that make your products look cheap.
Most importantly, dielines work as a communication bridge. Your designer speaks design language. Your printer speaks production language. Your manufacturer speaks assembly language. The dieline translates all of these into one clear set of instructions that everyone understands. It turns your creative vision into actionable specifications that actually work in the real world.
What Is a Dieline Components of
| Component | Description | Visual Representation |
| Cut Lines | Where the die-cutting machine will trim the material. | Solid lines |
| Fold Lines | Where the material will be creased for assembly. | Colored or dashed lines |
| Perforation Lines | For tearable or foldable sections (like easy-open tabs). | Dotted or dashed lines |
| Bleed Lines | Extra printing area beyond cut lines to avoid white edges. | Marked area outside cut |
| Safety Lines | The safe zone for important design elements. | Inner guide lines |
| Glue Tabs | Where adhesive should be applied for assembly. | Marked tab areas |
What Is a Dieline Creation Process and Tools
- Step-by-Step Dieline Development
Your dieline creation follows a clear, organized process that transforms your packaging idea into production-ready specifications.
Step 1: Measure and Reference
Everything starts with real measurements. Your supplier takes an existing package you want to replicate or measures a physical sample you provide. These concrete dimensions become the foundation that ensures your final packaging matches your expectations exactly.
Step 2: Choose Professional Software
Professional designers use specialized vector software to build your dieline. Vector graphics work like mathematical instructions rather than regular photos. They scale perfectly without losing quality, which means your measurements stay precise whether you’re viewing the file on screen or sending it to cutting machines.
Step 3: Layer Management
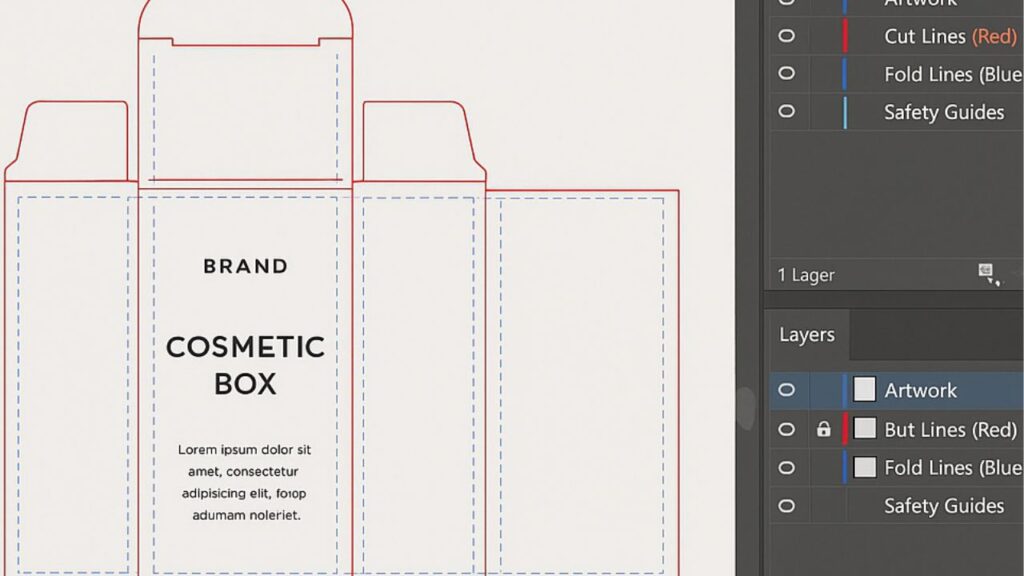
Here’s where organization becomes critical. Cut lines get their own layer. Fold lines live separately. Perforations have their own space. This layered approach eliminates confusion for production teams. Every line has a clear purpose, and machines know exactly what to do with each instruction.
Step 4: Set File Format
Your completed dieline gets saved in vector format like AI or PDF. These file types preserve every measurement and detail. Regular image files would lose critical information and cause production errors. Vector formats ensure cutting machines and printers receive exact instructions.
Here’s what matters most for you as a client. You don’t need to understand which software your supplier uses or how they organize their technical layers. Your responsibility is simpler but crucial. Make sure your supplier provides a proper vector dieline for your approval before production begins.
This approval step gives you the power to review dimensions, check design placement, and catch problems while changes are still quick and affordable.
Not sure if your dieline file is ready for production? Ask for our [Dieline Preflight Check] and avoid costly errors.
- No Need Worried about Software
Your packaging supplier’s design team will handle all the technical software requirements for creating your dieline. They use industry-standard tools that ensure precision and compatibility with manufacturing equipment.
As a client, you don’t need to choose, purchase, or learn any of these specialized programs. Your supplier takes care of the technical side while you focus on approving the final design and specifications.
- Common Pitfalls to Avoid
Two major mistakes can turn your packaging project into an expensive headache, but they’re easy to avoid when you know what to look for.
Never Accept Raster Files for Production
If your supplier sends you a dieline that looks like a regular photo or image file, stop right there. Raster images lose critical details when scaled and can’t provide the precise measurements that cutting machines need.
Always insist on vector dielines. These files maintain perfect accuracy at any size and give manufacturers the exact specifications they need for clean cuts and proper folds.
Check Your Artwork Placement Carefully
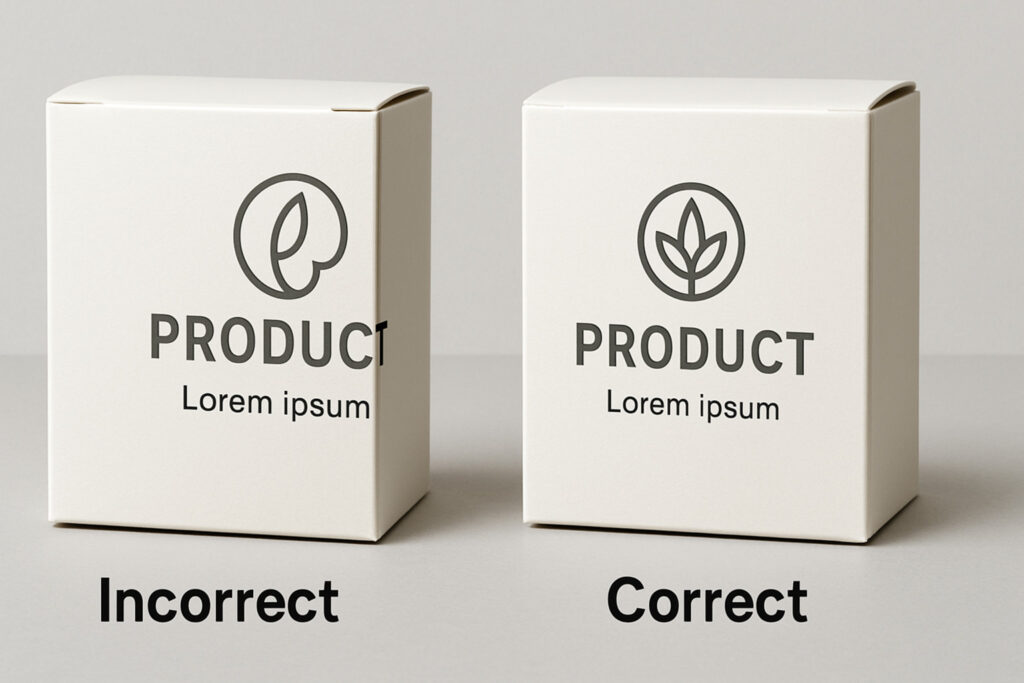
Your beautiful graphics need room to breathe during the cutting process. Make sure your artwork extends all the way to the bleed lines—this prevents white edges from showing up if the cutting is slightly off. Equally important, keep your logos, text, and other crucial elements safely inside the designated safety zones.
Anything too close to fold lines or cut edges risks getting chopped off or distorted during production. A few millimeters of buffer space now saves you from reprinting thousands of damaged boxes later.
What Is a Dieline Role in Packaging Workflow
- Pre-Production: Design and Approval
- 3D Mockups: Your supplier will create digital mockups or physical prototypes based on your dieline. These samples show you exactly how your finished packaging will look and feel before committing to full production. Think of this as your final dress rehearsal before the big show.
- Stakeholder Review: This is your moment to be thorough. Check that the dieline matches your product dimensions perfectly. Make sure there’s enough space for your items to fit comfortably. Verify that fold lines create clean, professional edges. Get your entire team involved in reviewing the prototype. Multiple pairs of eyes now prevent expensive mistakes later.
- Production: Die-Cutting and Assembly
- The factory transforms your approved dieline into a physical cutting die—essentially a giant, custom cookie cutter for your packaging. This tool will cut every single box in your production run with identical precision, whether you’re ordering 500 units or 50,000 units.
Want to see how your box will look before production? Request a [3D Dieline Mockup] tailored to your brand.
3. Post-Production: Prototyping and Quality Control
- Here’s where many clients make a costly mistake—they skip the prototype phase. Always ask for a sample made from your actual dieline using real production materials and processes. This isn’t just a digital mockup. It’s a real box that shows you exactly what your customers will receive.
Test Before Mass Production
- Put this prototype through its paces. Fill it with your actual products. Check how it opens and closes. See how it feels in your customers’ hands. If something doesn’t work quite right, adjustments can still be made without affecting your entire production run. A few dollars spent on prototyping can save thousands in reprints.
Dieline Applications and Industry Examples
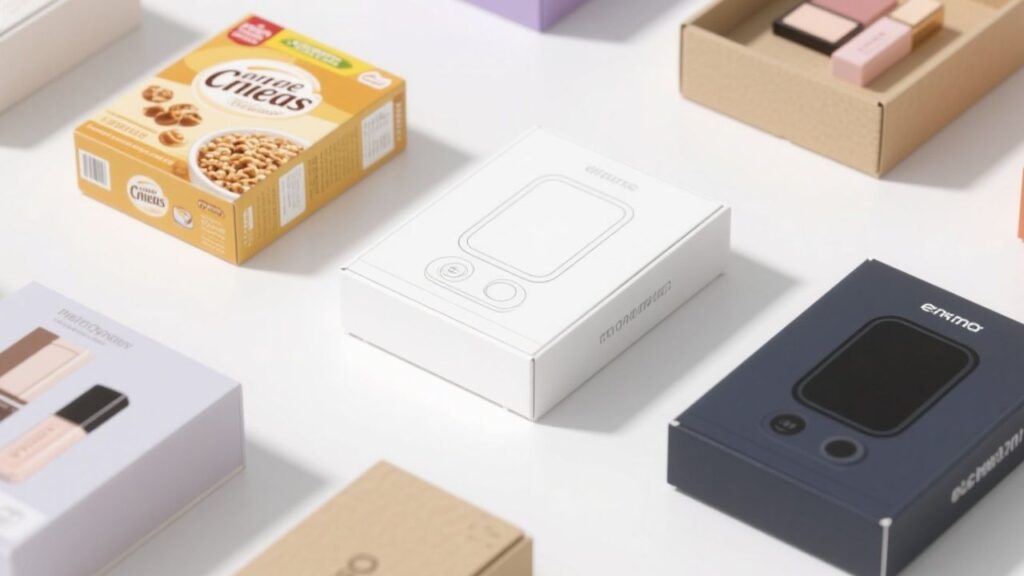
Cross-Industry Use Cases
Retail and Consumer Goods
Retail packaging ranges from tiny jewelry boxes to massive appliance cartons. Each requires different dieline approaches. They balance protection with cost efficiency. Shelf appeal matters for sales. Department stores need consistent packaging. Specialty shops want unique designs. Big-box retailers focus on shipping efficiency. Attractive display remains important.
Food and Beverage Industry
Food packaging faces unique challenges. Safety regulations are strict. Temperature considerations affect material choice. Freshness requirements drive design decisions. Dielines must accommodate food-safe materials. Packages need to stack properly in warehouses. They must look appetizing on shelves. Consumer appeal drives purchasing decisions.
Logistics and Shipping
E-commerce has exploded demand for shipping boxes. Products need protection during transit. These dielines focus on structural integrity. Efficient material use reduces costs. Easy assembly speeds fulfillment center operations. Every online order you receive uses logistics-focused dieline specifications. Shipping efficiency matters more than shelf appeal.
E-commerce Packaging
Online retailers face different challenges. Packaging must survive shipping. Positive unboxing experiences matter. Dielines often include tear strips. Easy opening improves customer satisfaction. Secure closures prevent tampering. Space-efficient designs reduce shipping costs. Product protection remains essential. Customer experience drives repeat purchases.
What Is a Dieline Key Differences vs. Mockup
| Aspect | Dieline (2D Template) | Mockup (3D Prototype) |
| Dimension | 2D file for manufacturing | 3D digital or physical preview |
| Purpose | Guide for factory cutting/folding | Visualize look and structure |
| Workflow | Used in pre-production and printing | Used for design approval |
Clients should always review a mockup or physical sample based on the dieline before approving mass production.
What Is a Dieline Best Practices for Designers
Collaborate Early with Your Supplier
Start the conversation with your packaging supplier before you finalize your design concepts. Early collaboration prevents costly redesigns later when you discover your beautiful packaging idea can’t actually be manufactured efficiently.
Your supplier understands production limitations, material constraints, and cost factors that impact your dieline design. Share your vision early, and let them guide you toward solutions that work both creatively and practically.
Keep Your Package Structure Simple
Complex packaging designs might look impressive, but they often create unnecessary headaches and expenses. Simple structures cost less to produce, require fewer specialized tools, and reduce the chance of assembly errors during manufacturing.
Focus on clean lines, standard folding patterns, and straightforward construction. Your customers care more about product protection and easy opening than elaborate packaging acrobatics that inflate your costs.
Test a Real Sample Before Mass Production
Never skip the physical prototype phase, no matter how confident you feel about your dieline. Digital mockups can’t replicate the actual feel of opening your package or reveal potential structural weaknesses. Request a sample made from your production materials using the exact dieline specifications. Fill it with your actual products. Test how it ships, stores, and opens. This small investment in sampling prevents massive losses from defective production runs.
Always Use Vector-Based Dieline Files
Insist on vector files for all dieline work. These mathematical-based graphics maintain perfect accuracy when scaled and provide the precise measurements that cutting equipment requires. Regular image files lose critical details and create production errors. Vector dielines ensure your packaging dimensions stay exact from the initial design through final manufacturing, eliminating costly mistakes caused by file format incompatibility.

Practical Tips for Clients Ordering Custom Packaging
Start with Accurate Information
Provide your packaging supplier with precise product dimensions and any special requirements before dieline creation begins. Measure your products carefully and note any fragile areas, weight distribution concerns, or specific opening mechanisms you prefer. The more details you share upfront, the better your dieline will fit your actual needs.
Leverage Your Supplier’s Design Expertise
If you don’t have an in-house designer, request your supplier’s structural design service. Most professional packaging companies can create a dieline based on your product sample, rough sketch, or detailed description. This eliminates the risk of hiring a separate designer who might not understand manufacturing requirements or create files that can’t actually be produced.
Review and Approve Carefully
Take the dieline review process seriously. Don’t just glance at digital files and assume everything looks correct. Ask for a physical sample or prototype made from your actual dieline. Test how your products fit inside. Check how the package opens and closes. Verify that all design elements appear where you expect them. This approval phase is your safety net against expensive production mistakes.
Communicate Special Features Early
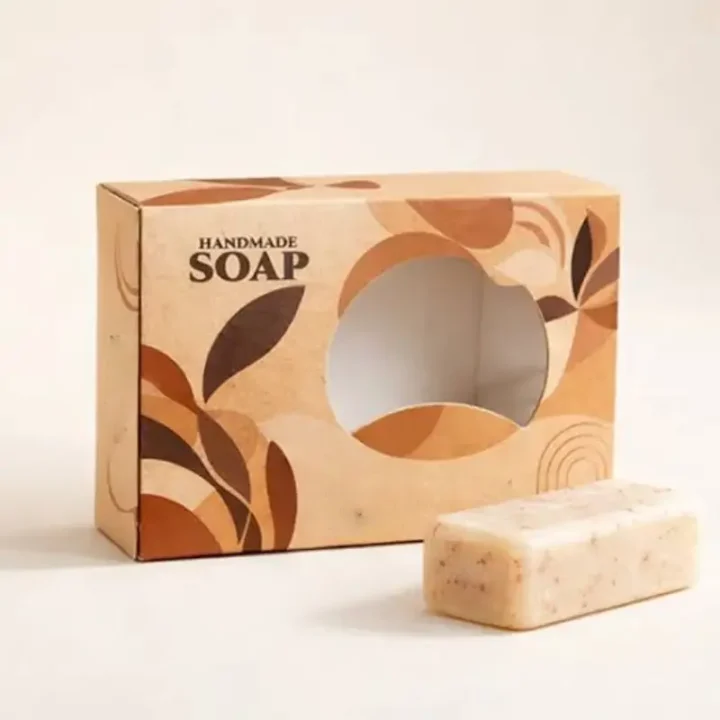
If your packaging needs windows, handles, embossing, or other special features, make sure these appear clearly on the dieline and discuss them thoroughly with your supplier. These elements affect both the dieline design and the production process. Mentioning them late in the process can cause delays and additional costs.
Understand the Impact of Changes
Remember that even small changes to an approved dieline can affect both cost and delivery time. Once production tools are created based on your dieline, modifications require new cutting dies, revised printing plates, and additional setup time. Lock in your design during the approval phase to avoid these complications.
For a free consultation on your first project, reach out to our [Packaging Advisory Team]
How Professional Integration Eliminates Your Risk
Here’s how a truly integrated process transforms dieline anxiety into complete confidence.
We Create, Not Just Check
You don’t need to find a designer, pay them separately, and hope they create usable files. Simply tell us about your product—its size, weight, and how you want it to function. Our in-house structural designers create the dieline as the foundation of our manufacturing process. It’s not a separate service you’re gambling on; it’s step one of turning your vision into reality.
Physical Proof Before Financial Commitment
Before running thousands of boxes, we use your dieline to create a physical, machine-cut prototype using your chosen materials. You receive this tangible sample to hold, fold, and test with your actual products. The fear of abstract mistakes disappears because you’re approving a real box, not a digital file you don’t fully understand.
Our Risk Becomes Your Guarantee
Since we handle both design and manufacturing, we have everything invested in dieline perfection. If the dieline contains flaws, our printing plates fail, our cutting dies malfunction, and we waste thousands of material sheets on our factory floor. Our multi-stage internal proofing process protects our own production efficiency, which automatically safeguards your budget.
The bottom line is simple. You never have to worry about dieline mistakes wasting your money because we absorb the entire technical risk. We deliver a perfect physical sample and only proceed to mass production after you confirm, “Yes, this is exactly what I want.” Your budget stays protected throughout the entire process.
This is just one part of creating exceptional packaging. Read our Ultimate Guide to Post-Printing Technologies to learn about the complete system, from blueprint to finished product.
Conclusion
Understanding what is a dieline transforms packaging from a confusing technical challenge into a manageable process with predictable results. Dielines serve as the critical bridge between your 3D packaging vision and the 2D manufacturing reality that brings it to life.
Every component—from cut lines that guide precise blade work to bleed zones that prevent unsightly white edges—works together to ensure your finished packaging matches your expectations exactly.
Final Recommendations
For Simple Projects
Use your supplier’s existing templates or request their design team to create a custom dieline based on your specifications. Most straightforward packaging needs can be handled efficiently through supplier-provided structural design services. This approach saves time, reduces costs, and ensures compatibility with their manufacturing equipment.
For Complex Designs
Work closely with your supplier’s structural engineering team from the beginning. Share your vision early, discuss technical limitations honestly, and insist on physical samples before committing to full production. Complex packaging requires more collaboration, but the investment in upfront communication prevents expensive redesigns later.
Prioritize Physical Prototyping
Never skip the physical prototype phase, regardless of project complexity. Digital mockups can’t replicate the actual experience of handling your packaging. Request samples made from production materials using your approved dieline. Test functionality, aesthetics, and product fit thoroughly. This small investment in validation protects your entire production budget.
Ready to eliminate dieline risks from your next packaging project? Book a [Free Dieline Consultation] today.
Frequently Asked Questions (FAQ)
Q1: My product has a special shape or size. Can you make a dieline to fit it?
Yes, we can create a custom dieline tailored to your product’s unique dimensions and shape. Just provide a sample or detailed measurements, and our structural designers will handle the rest.
Q2: I only have a hand-drawn sketch or a physical sample, not a digital design file. Can you help create a dieline?
Absolutely. We can develop a professional dieline based on your sketch or physical product. Our team will translate your idea or sample into a precise, production-ready template.
Q3: How do I know the dieline is correct? What happens if there’s a mistake?
We always provide a physical or digital prototype for your approval before mass production. If there is ever an issue with the dieline, we’ll correct it at no cost to you and ensure no defective packaging is produced.
Q4: Will changes to the dieline affect cost or lead time?
Yes, any modifications to the dieline after approval may result in additional costs or longer production time. That’s why we recommend finalizing all details before confirming the dieline for manufacturing.


 English
  العربية
  Deutsch (Sie)
  Español
  Français
  日本語
日本語  한국어
한국어  Italiano