

Ever picked up a business card and felt those raised letters under your fingertips? That smooth, bumpy feeling isn’t just decoration – it’s a smart way to make people remember you. Embossing vs debossing are two printing tricks that add texture you can actually feel to paper and packaging.
One pushes the design up while the other presses it down. Both make your brand feel more expensive and help it stand out from the pile. Want to know which one works better for your project?
Think of this guide as your friendly roadmap through the world of raised and pressed printing. We’ll break down exactly what embossing and debossing mean, how they’re made, and where they work best. No confusing tech talk – just straight answers about which technique fits your product and budget.
Embossing vs Debossing: Understanding the Core Processes
Embossing: Raising the Design
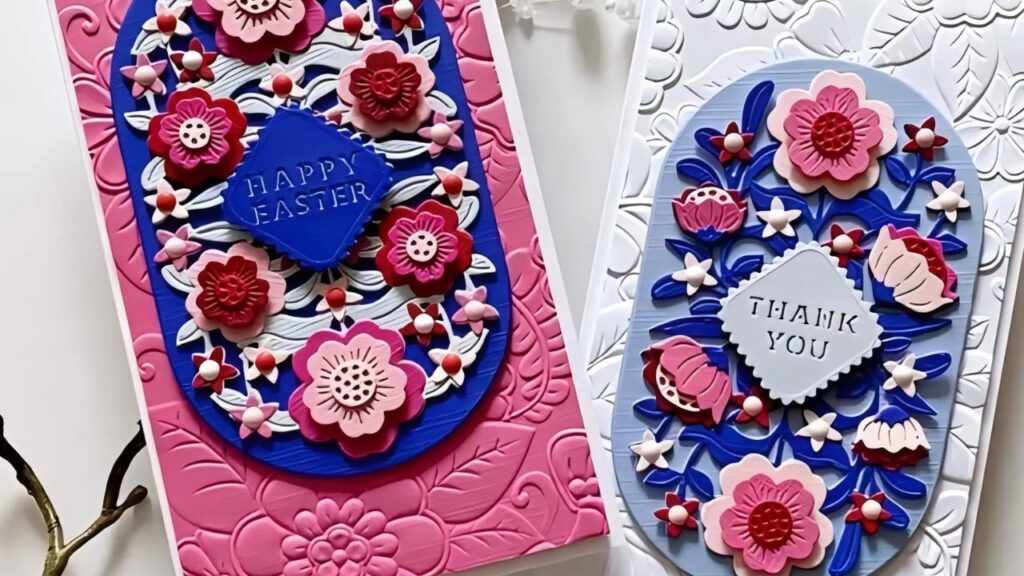
Definition
Here’s the simple truth about embossing – it makes your design stick up from the paper like a tiny mountain. Picture pressing a coin into soft clay and getting that raised image. That’s exactly what happens with embossing, except we use special metal tools called dies to push your design up from the paper.
Process
The process is pretty straightforward. We sandwich your paper between two metal pieces – one pushes up, the other holds down. When we apply pressure, your logo or text pops up and becomes something people can actually feel. You’ll notice a small dent on the back of thin paper, but that’s normal.
The trick is using thick, strong paper like heavy cardstock or good leather. Thin materials just tear or look warped, and nobody wants that for their brand.
Debossing: Indenting the Design
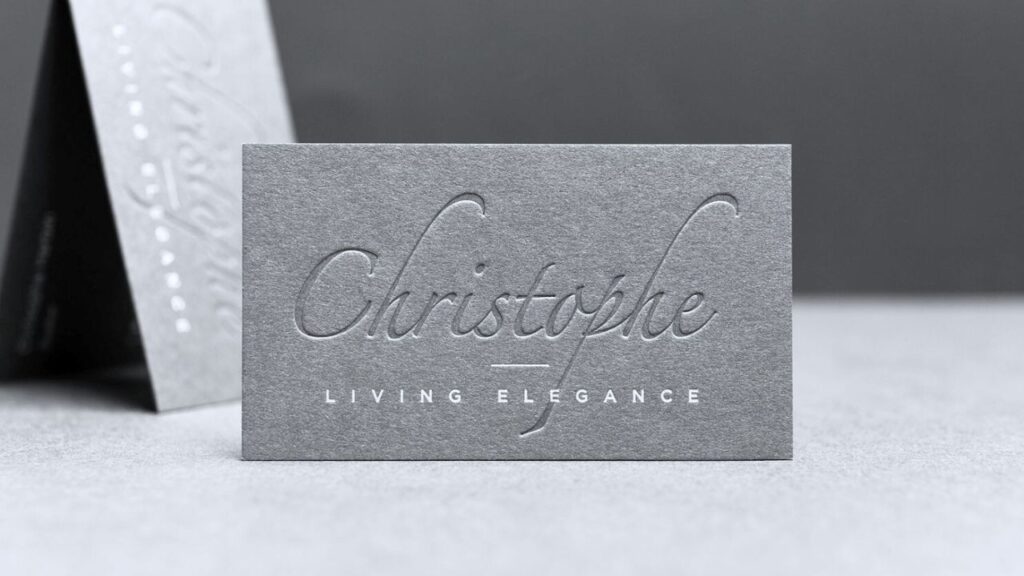
Debossing works the opposite way – it pushes your design down into the paper, like making a footprint in sand. Instead of sticking up, your logo or text sinks below the surface and creates a smooth valley you can run your finger across. It gives off that quiet, classy vibe that whispers “expensive” instead of shouting it.
Process
The process is actually simpler than embossing. We only need one metal die that stamps down into your material, kind of like using a cookie cutter but gentler.
Your design stays clean on the back when you use thick paper. You can leave the sunken area plain for that subtle look, or fill it with ink or shiny foil to make it pop. Debossing works on both thin and thick materials, but thicker stock gives you that perfect, clean impression without any tears or mess-ups.
Embossing vs Debossing: A Side-by-Side Comparison
| Aspect | Embossing | Debossing |
|---|---|---|
| Visual Effect | Raised, 3D texture; catches light prominently. Embossing delivers a bold, eye-catching effect. | Sunken, subtle texture; creates shadow for depth. Debossing offers a more understated, refined look, often used for sophisticated branding. |
| Tactile Experience | Raised edges are tactile and noticeable. | Indented edges offer a smooth, refined feel. Debossing provides a pleasant tactile sensation without being too bold. |
| Material Thickness | Requires thick stock (e.g., thick cardstock, rigid paper, leather). “Thick cardstock” or “rigid paper” are clearer to most clients than technical weights. | Works with thin or thick materials (thick stock prevents backside indentation). Debossing is flexible for various paper types, but thick stock keeps the impression neat. |
| Die Complexity | Two dies (upper/lower) needed; higher cost. The main concern for clients is increased cost and time, not the technical die structure. | Single die (or reverse setup); lower cost. Debossing is more budget-friendly for large runs due to simpler tooling. |
| Backside Impact | Thin materials show a reverse indentation. | Thick materials leave the backside unaffected. |
| Design Focus | Ideal for logos, headlines, and bold statements. Embossing works best for strong, simple designs that need to stand out. | Suits minimalist designs, subtle branding, or texture layers. Debossing is perfect for subtle detail, minimalist branding, and layered textures. |
The Advantages of Embossing vs Debossing
Now that you know how each technique works, let’s talk about what they can actually do for your brand. Both have their sweet spots, and picking the right one depends on the message you want to send.
Advantages of Embossing
Enhanced Visibility: Embossing is like giving your design a megaphone – it makes people notice. When your logo sticks up from the paper, fingers naturally want to touch it, and eyes can’t help but look.
Durability: It also makes your materials tougher since the raised areas add extra thickness that fights off wear and tear.
Brand Luxury: Most importantly, embossing screams “premium quality” without saying a word. It’s that instant signal that tells customers they’re holding something special.
Embossing works great when you need that premium, touchable feeling – perfect for luxury packaging or fancy event invitations.
Typical Applications:
Business cards, wedding invitations, book covers
Packaging (cosmetics, luxury goods)
Leather/fabric textures in fashion
Use embossing when you want your brand to feel exclusive and worth the extra money.
Want your brand to have this unforgettable tactile experience too? Click here to explore Leitai’s exquisite embossed packaging solutions
Advantages of Debossing
Subtle Elegance: Debossing takes the opposite approach – it whispers instead of shouts. Those smooth, sunken areas work perfectly for clean, simple designs or high-end stationery.
Tactile Sophistication: It’s touchable without being flashy, which makes it ideal for brands that want to seem confident and understated.
Versatility: The best part? You can combine debossing with shiny foil stamping or colored ink to add just the right amount of contrast without going overboard.
Debossing gives you that refined, sophisticated look and pairs really well with other fancy finishes.
Typical Applications:
Luxury packaging, leather goods (handbags, wallets)
Business cards (thick stock for single-sided effects)
CD covers, cosmetic packaging for understated luxury
Choose debossing when your brand wants to look modern, confident, and quietly expensive.
If your brand pursues a low-key yet refined texture, please take a look at how our gravure printing process can add charm to your packaging.
Design Considerations for Embossing vs Debossing
Getting the technique right is only half the battle. The other half comes down to smart choices about materials, design complexity, and budget. Let’s break down what really matters.
Material Selection
Embossing: Go with thick paper, heavy cardstock, or solid materials like metal and acrylic. Think of it like building a house – you need a strong foundation to support that raised design.
Debossing: You’ve got more flexibility here. Thin paper works great for delicate indents, while thick stock gives you those clean, single-sided effects that look super professional.
Pick your material based on what you want the final result to feel like and whether people need to see or touch the design on one side or both.
Design Complexity
Embossing: Keep it simple and bold. Complex patterns with tiny details just turn into a mushy mess when you try to raise them up.
Debossing: This is where you can get fancy. Fine lines, detailed textures, even tiny watermarks or micro-logos come out looking sharp and clean.
Remember – embossing loves strong, simple graphics, while debossing can handle all those intricate details you’ve been wanting to use.
Combined Techniques
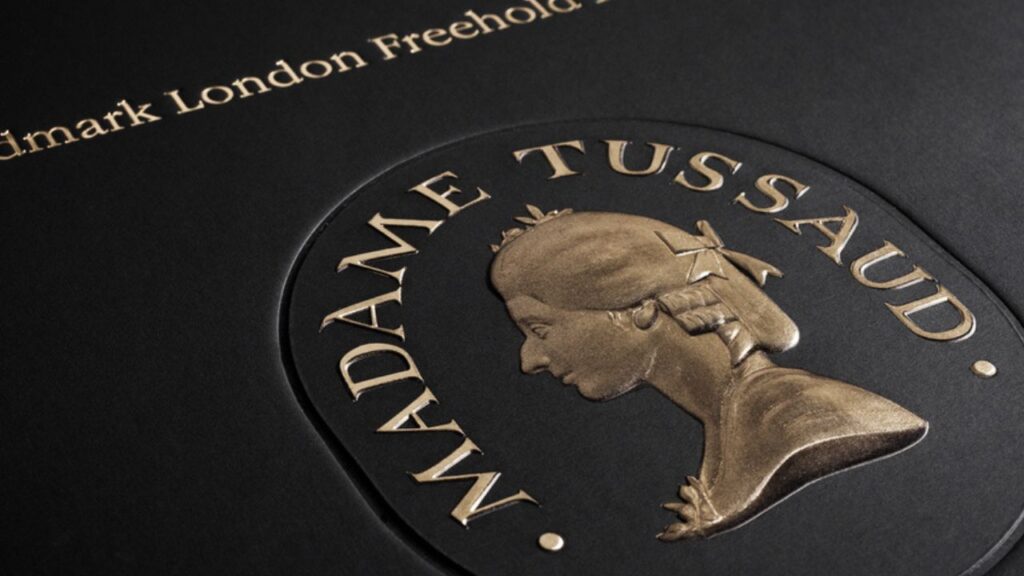
Emboss + Deboss: Mix them up for serious contrast. Picture a raised logo sitting on top of a debossed background – that’s the kind of effect that makes people stop and stare.
Foil Stamping Integration: Add shiny metallic touches to your embossed or debossed areas for that luxury effect that screams “expensive.”
Combining these techniques creates truly unique and high-end packaging that your competitors can’t easily copy.
Interested in combination processes? That’s our specialty. [Contact our design experts today] to discuss how we can create a unique visual effect for your packaging.
Embossing vs Debossing: A Look at Cost vs. Impact
Embossing: Costs more upfront because you need two dies, but it’s perfect for high-impact projects where you don’t need huge quantities.
Debossing: Cheaper to set up since you only need one die, which makes it great for large orders or when you’re watching your budget.
For big orders or tight budgets, debossing gives you more bang for your buck. For premium, high-impact projects where you want maximum wow factor, embossing is worth every penny.
Pick the process that matches your brand style and budget. Want that luxury feel? Go with embossing. Prefer clean minimalism? Debossing is your friend. If the budget is tight or you’re ordering thousands, debossing with a single die saves money. For the best tactile and visual punch, embossing wins if your budget allows it.
Want to know which solution is best suited to your project budget? [Click here for a free quick quote] and let the data help you make your decision.
When to Choose Embossing vs Debossing
| Project Goal | Embossing | Debossing |
|---|---|---|
| Create a bold, tactile statement | ✓ Best for projects needing strong impact and touch. | ✗ |
| Achieve minimalist elegance | ✗ | ✓ Debossing is ideal for understated, modern branding. |
| Work with thin materials | ✗ (risk of backside indentation) | ✓ |
| Print on both sides of stock | ✗ (backside affected) | ✓ (thick stock allows front-only design) |
| Incorporate foil or color fills | ✓ (raised areas catch light) Foil stamping combines well with embossing for a luxury finish. | ✓ (indented areas create depth with foil) Debossing with foil creates a subtle, premium effect. |
Embossing vs Debossing in Action: Real-World Examples
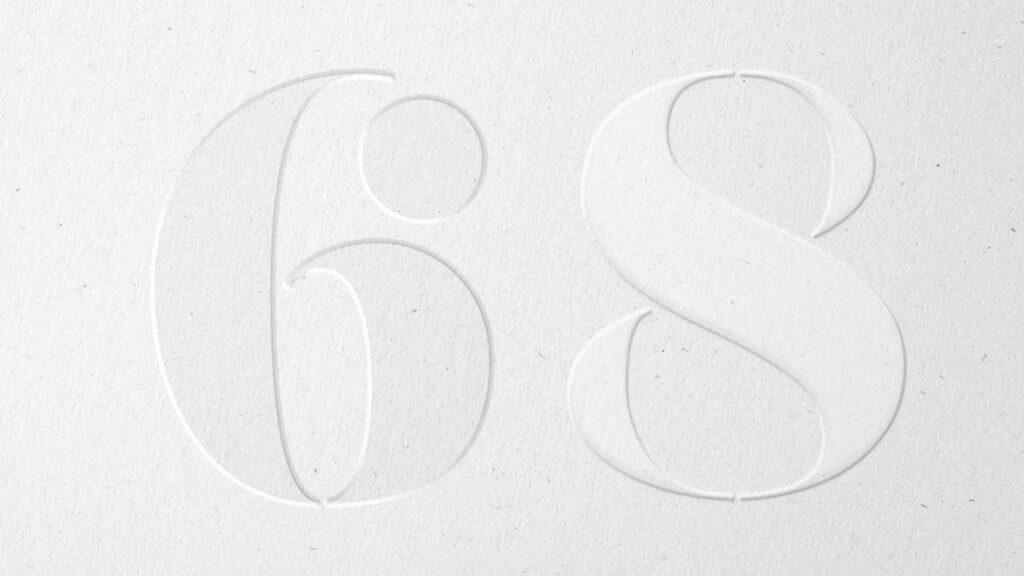
Sometimes the best way to understand these techniques is to see them in action. Here are some real examples that show exactly when and why brands choose embossing or debossing.
Embossing in Action
Picture walking into a fancy hotel lobby and getting handed a business card. The moment you touch it, you feel that raised logo under your thumb – thick, solid, expensive. That’s embossing doing its job, telling you this place is worth the premium price without saying a word.
Or think about that wedding invitation that made you smile before you even read it. The 3D floral emboss pattern feels like tiny flower petals under your fingers, making the whole invitation feel special and worth keeping.
Embossing gets picked when brands want high-impact, memorable experiences that people can’t ignore.
Debossing in Action
Now imagine pulling out a high-end leather wallet and running your finger over that smooth, sunken brand logo. It’s there, but it doesn’t scream at you – just a quiet reminder of quality that feels perfectly placed.
Or that beautiful book on your coffee table with the debossed title and texture. Clean, simple, but undeniably expensive-looking. The sunken letters catch light differently and create shadows that make the design come alive.
Debossing gets used for luxury packaging and products where brands want that elegant, understated touch that whispers “premium” instead of shouting it.
Conclusion: Making the Final Choice Between Embossing vs Debossing
So there you have it – the real difference between making your design pop up or sink down. Embossing is your go-to when you want bold, touchable impact that grabs attention. Debossing is perfect when you need that quiet, classy sophistication that feels expensive without being flashy.
Both add real texture that makes your brand memorable, but your choice comes down to your brand personality, material choice, and how much you want to spend.
Key Takeaways
Embossing is bold, touchable, and great for making a strong visual statement.
Debossing is subtle, elegant, and perfect for designs that need sophistication.
Both techniques make your printed materials feel more expensive through texture, but your choice depends on your material, budget, and what look you’re going for.
Both add real value to your printed materials, but let your brand style, material choice, and project budget guide your decision.
Final Recommendations
Always test samples with your actual material to check texture and how well it holds up.
For really unique effects, mix embossing or debossing with foil stamping or regular printing.
Talk to a professional printer to get the die design just right and keep costs reasonable for your project.
Getting samples and talking with your printer first always helps make sure the final product matches what you imagined.
Ready to add some texture to your packaging? Contact us, we’ve helped hundreds of brands choose the perfect embossing or debossing technique for their needs. Let’s chat about which approach will make your product impossible to ignore on the shelf.
Frequently Asked Questions (FAQ)
My logo is very detailed. Is embossing suitable?
Embossing works best for bold, simple designs. If your logo has intricate details, please send us the file for evaluation.
Will embossing or debossing leave marks inside my packaging box?
With sufficiently thick material, marks are rarely visible inside the box. We will recommend the best material for your specific needs.
Can I combine embossing with foil stamping?
Yes, many premium brands combine embossing and foil stamping to maximize both tactile and visual impact.
Will these techniques affect other finishing steps, like lamination?
Certain finishes may affect processes like lamination, foil stamping, or printing. Please consult us to confirm the best production flow for your project.
 English
  العربية
  Deutsch (Sie)
  Español
  Français
  日本語
日本語  한국어
한국어  Italiano